Create API Key
Learn how to create an API key for the SimpleCold Email Validation API by following these simple steps.
Step-by-Step Guide
Step 1: Log in to the Dashboard
Visit simplecold.com/dashboard and log in with your account credentials. If you don't have an account, sign up and verify your email.
Step 2: Navigate to the API Keys Section
Once logged in, go to the API Keys section by visiting simplecold.com/dashboard/api-keys.
Step 3: Click "Create API Key"
In the API Keys section, click the "Create API Key" button. Refer to the screenshot below for guidance:
(Add a screenshot here showcasing the API Keys page with the "Create API Key" button highlighted.)
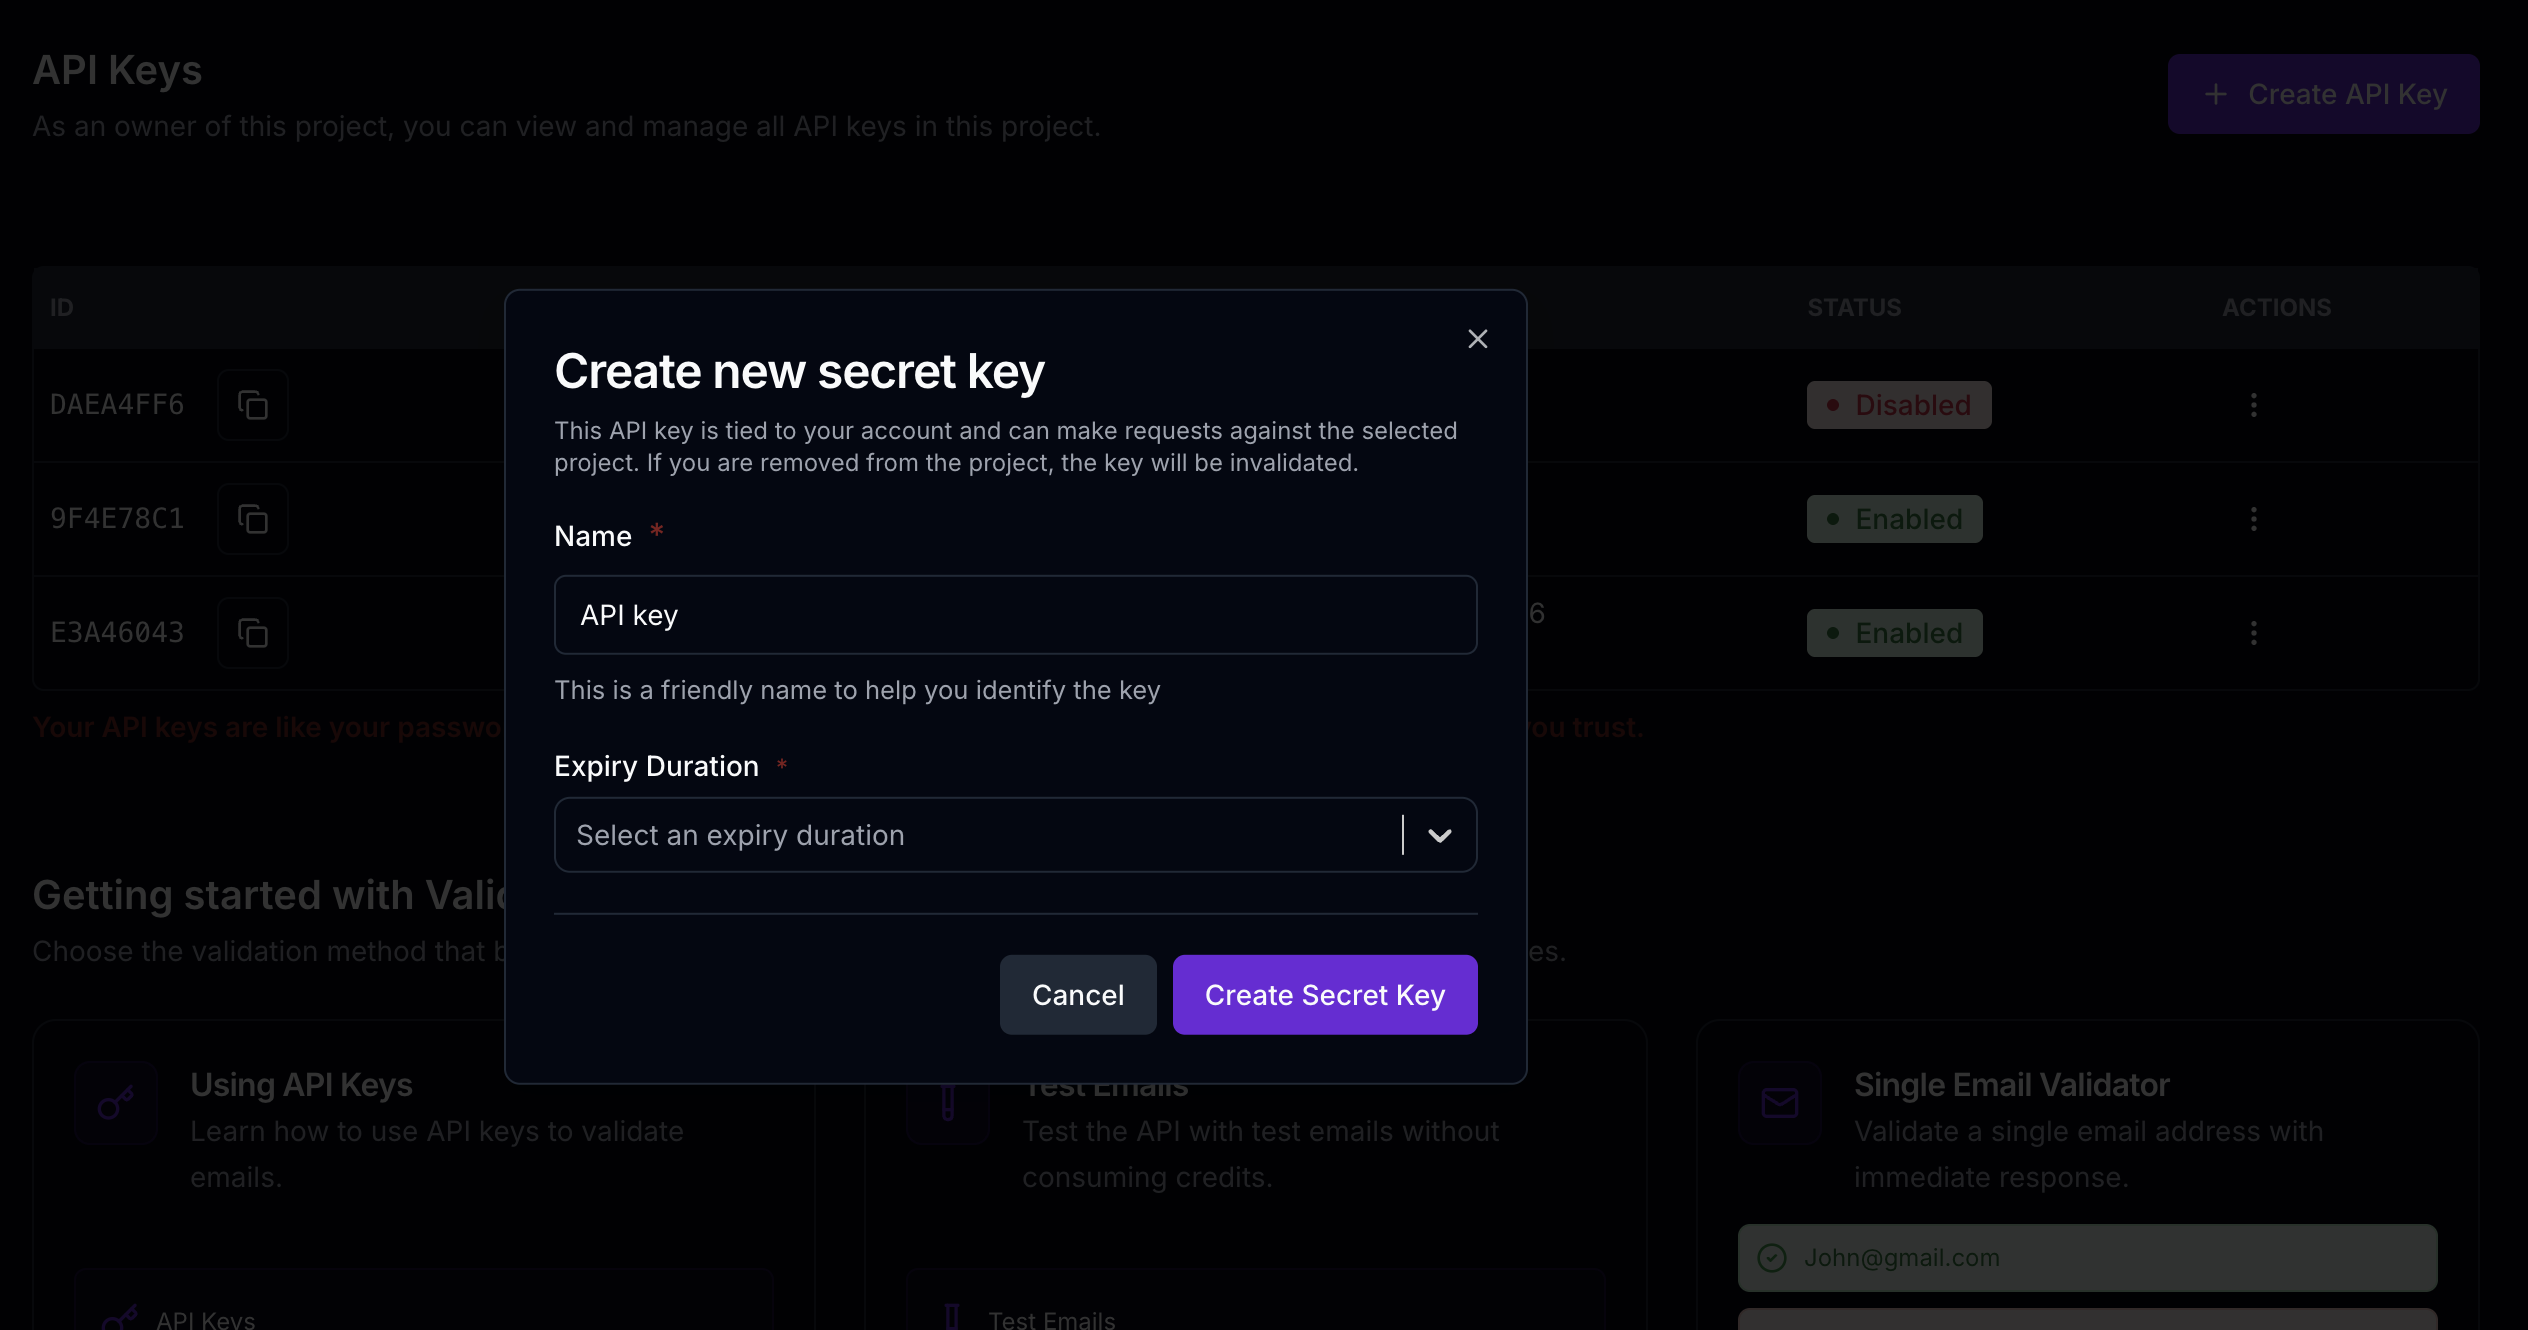
Step 4: Add a Remark (Optional)
While creating your API key, you can optionally add a remark to label or describe the key for future reference.
Step 5: Set Expiry (Optional)
Optionally set an expiration date for your API key. This is useful for temporary keys or enhanced security.
Step 6: Copy the API Key
Once the API key is generated, you can copy it using the copy button. The API key will always be accessible in your dashboard, though it will be displayed in a masked format (showing only the first and last few characters). You can copy the full key at any time using the copy button next to each key in the API Keys section.
Using Your API Key
Now that you've created your API key, you're ready to start using it to authenticate your requests to the SimpleCold Email Validation API. Your API key should be included in the Authorization header of all API requests using Bearer token authentication.
To learn how to use your API key in your applications, including code examples in various programming languages, see the Using API Key guide.